Managing a high volume of customer inquiries gets chaotic fast. How can your support team possibly keep up? The answer is ticketing systems.
Tickets create an organized way to track issues and requests from start to resolution. Agents can juggle multiple inquiries by documenting them in tickets. These tickets can be assigned, prioritized, escalated, and resolved as your team works behind the scenes.
HubSpot's Service Hub includes robust ticketing to streamline request management. With customized pipelines, automated workflows, and seamless integrations, helps agents handle more volume and deliver better experiences.
If you're new to Service Hub ticketing, this blog will outline the basics you need to get started.
Overview of HubSpot’s Tickets

Tickets are at the core of managing customer issues and requests within Service Hub. When a customer reaches out with a problem or question, agents can create a ticket to track that inquiry from start to resolution.
Features of HubSpot's tickets include:
Custom Ticket Fields
Customizing tickets with fields like type, priority, product category, etc., lets you capture crucial contextual information upfront. It helps agents understand issues quicker and solve them more efficiently.
Internal Notes
Agents can use this feature of adding internal-only notes to collaborate. Agents can share background info, progress updates, tips, or questions to streamline handling. This transparency helps provide exceptional service.
Assignment and Collaboration
You can assign tickets to specific agents or teams. Multiple agents can work on the same ticket. It ensures accountability. Collaboration features let agents hand off tickets smoothly. Various agents can communicate within the ticket to solve issues requiring cross-team engagement.
Service Level Agreements (SLAs)
SLAs based on ticket priority ensure customers get timely responses based on urgency. High-priority tickets linked to short SLAs can be escalated appropriately to meet critical standards.
Links to Contacts
Linking tickets to customer contacts or companies provides helpful background info like past issues, communications, and personal details. This context facilitates more personalized service.
Status and Pipeline Workflows
Tickets moving through statuses like New, Open, Resolved, etc., allow better progress tracking. Agents can identify bottlenecks in the workflow and continue improving response times.
Reporting
Insightful ticket reports reveal metrics like resolution time, reopened ticket rate, workload by agent, and more. This visibility lets you analyze and improve support operations.
Omnichannel Support
Unifying tickets across channels like email, live chat, etc., provides a complete history of customer interactions. Agents can deliver seamless, context-aware service.
Benefits of Using Tickets for Customer Service
As you may have learned by reading about the features of HubSpot Tickets, using a ticketing system brings many benefits that can vastly improve customer service operations. Here are some of the top reasons to use tickets for managing customer issues:
1. Centralized Issue Tracking
![]()
Tickets allow you to log all details and communication about a customer issue in one place. It’s more organized and ensures everything runs smoothly. Agents can quickly get up to speed on a ticket's status and history.
2. Enhanced Collaboration
With tickets, multiple agents can work together on an issue. They can add notes, attach files, and keep the conversation going within the ticket. It facilitates smooth hand-offs and transparency.
3. Increased Efficiency
Tickets enable agents to categorize issues and set priorities and due dates. It allows them to manage their time and workflow better. It also helps ensure customers get responses based on urgency.
4. Robust Reporting
The data from ticket management provides valuable insights through reports. You can analyze metrics like time to resolution, ticket volume by issue type, number of tickets closed, and more. This visibility helps improve operations.
How to Use Tickets in HubSpot Service Hub
Before you can start using tickets, you should set up an inbox for customer queries on HubSpot Service Hub. It’s to route incoming customer emails into Service Hub and automatically generate tickets for your agents to work.
Then, you can create tickets as you read and respond to customers’ questions and requests. Let’s walk through the basic steps to setting up and using those tickets:
1. Create Tickets
First, you need to create a new ticket. There are several ways to do this:
Create from the Tickets Index Page:
One way is to make a ticket right from your homepage!
- Go to the Service > Tickets section in HubSpot.
- See that "Create Ticket" button? Give that a click.
- Now, just fill in the details — name, status, etc.
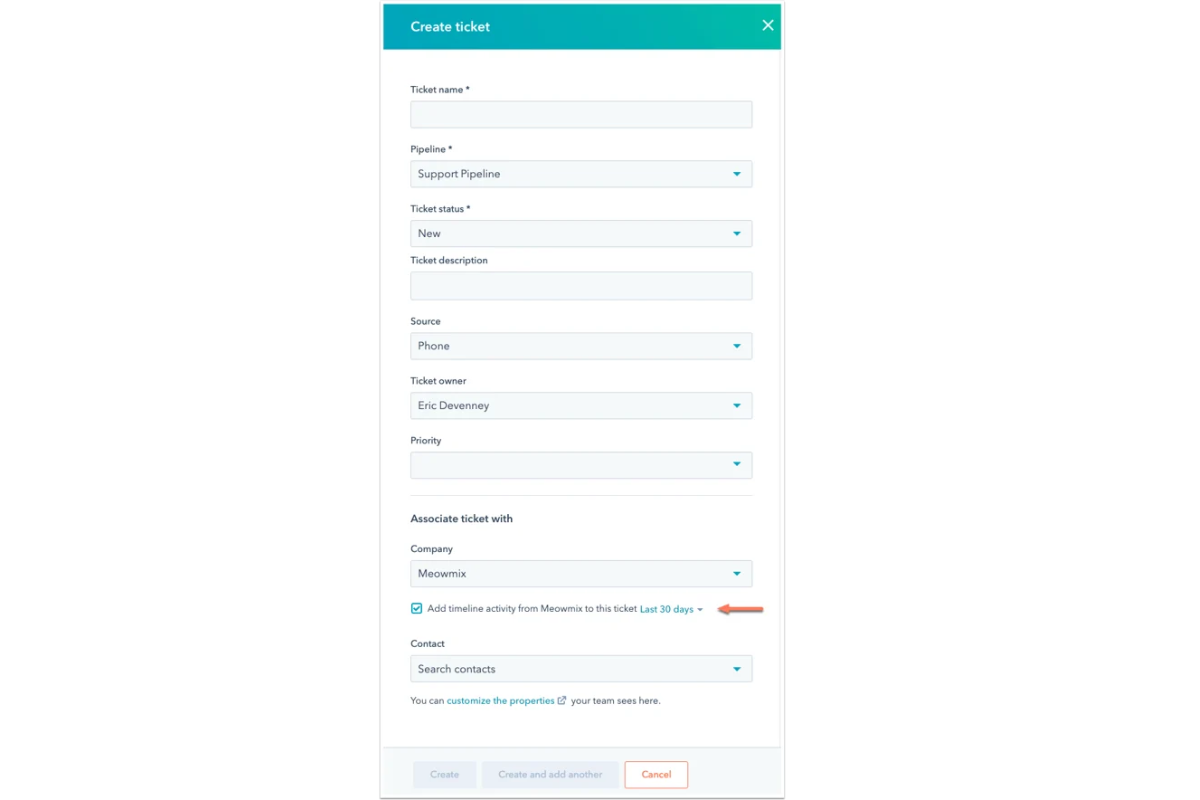
- If needed, you can also connect a contact or company to the ticket.
Create from a Contact/Company Record:
Next up is making tickets directly from a contact or company record.
- Open up the contact or company record you want to connect.
- Scroll down to the Tickets section and click "+ Add."
- In the popup, fill in all the ticket details.
- The ticket will automatically link up to that record. Nice!
Create Tickets from Your Inbox:
Last one — you can create tickets right from your conversations inbox!
- Connect your forms to generate tickets from submissions.
- Turn on email-to-ticket creation to make tickets from emails.
- Use Messenger bot actions to create tickets from Facebook messages.
2. Create New Pipelines
Alright, so you've got the basics of making tickets down. Now, how about creating pipelines to organize them?
You can create more than one, but you only need those if you've got different processes and statuses.
Say your company has an online support team that uses statuses like Open, Waiting on Customer, and Resolved. Still, you also have an in-store support team that needs other statuses like In Service, Follow-Up, and Scheduled.
In this case, separate pipelines would be best since the processes and statuses are different. Otherwise, use one pipeline across teams and control access with permissions.
Here's how to make a new pipeline:
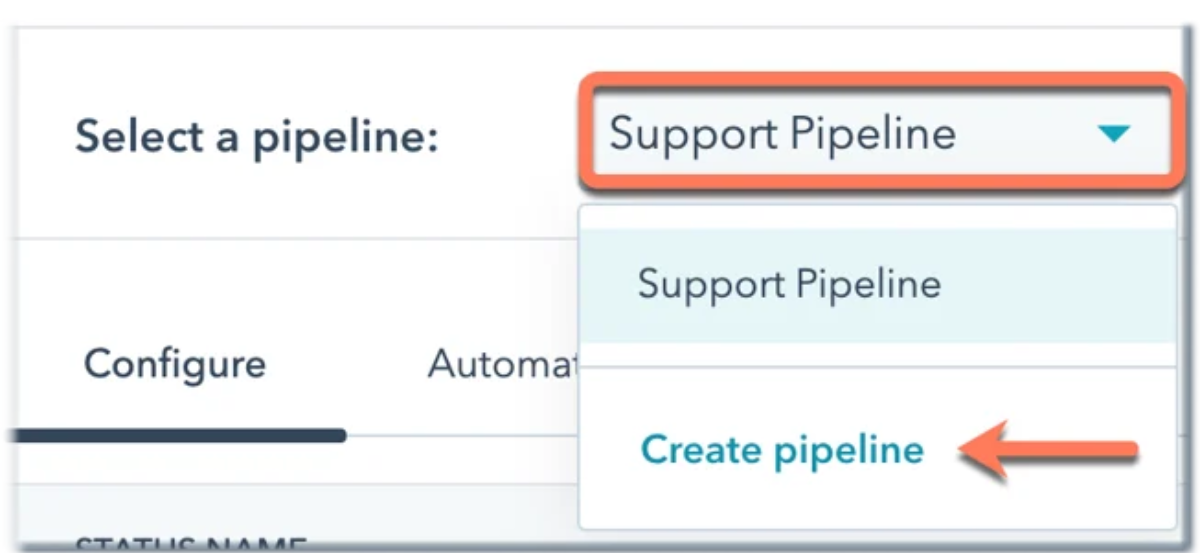
- Go to Settings > Objects > Tickets > Pipelines tab
- Select "Create Pipeline"
- Give it a name and hit create!
3. Customize Ticket Workflows
Once you've set up your pipelines and statuses, you can customize them further to match your process.
Renaming Pipelines
- To rename a pipeline, go to the Actions menu and select Rename.
- Enter the new name and hit Rename.
Reordering Pipelines
- From the Actions menu, choose Reorder Pipelines.
- Click and drag pipelines into the desired order.
- Hit Save when done.
Adding and Removing Statuses
- Add new statuses by clicking + Add Status, naming it, and setting Open/Closed.
- Reorder or delete statuses as needed.
- Use bulk editing to move tickets out of a deleted status.
Customizing Statuses
- Edit status names by clicking the name and updating.
- View API names by clicking the code icon.
- Set required properties so users must fill them in.
- Choose which properties appear when a ticket enters the status.
- Reorder status properties.
4. Manage Tickets Efficiently in Your Inbox
When a customer reaches out to your support team, you'll likely create a ticket to track the inquiry. You can connect these tickets directly to the conversations for a complete record.
Viewing Tickets in Conversation
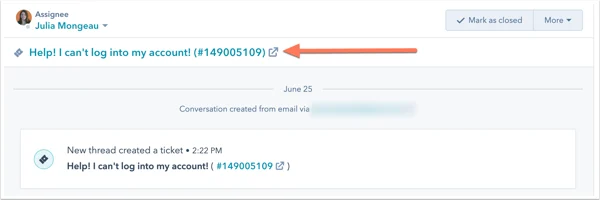
- Open the conversation in your inbox
- Expand the Ticket section in the right sidebar
- See the linked ticket details and click to edit
- View more ticket info by clicking "view more."
- Customize the visible ticket properties as needed
- Edit ticket properties directly in the conversation sidebar
Replying to Customers
- Use the sidebar info to inform your response
- Reply directly in the conversation using the editor
Closing Out Tickets and Conversations
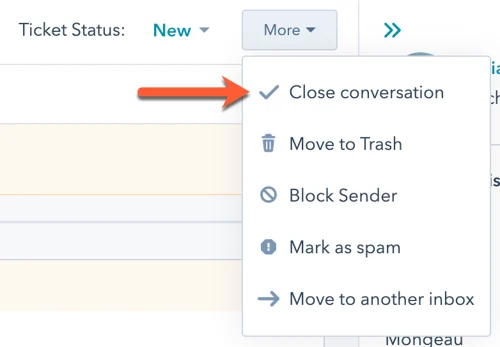
- Close the ticket by selecting "Closed" from the Ticket Status dropdown
- It also closes associated conversations
- Reopen a closed ticket by changing the status again
- Close just the conversation via the "More" dropdown
- Deleting a conversation also deletes the linked ticket
- And vice versa - deleting the ticket deletes the conversation
5. Automate Ticket Management With Rules
Setting up automation for your tickets can streamline workflows and improve efficiency. Here's how to configure different types of ticket automation:
Enable Ticket Creation
- Go to Settings > Objects > Tickets > Pipelines
- Select a pipeline and go to the Automate tab
- Connected channels listed will create tickets from messages
- Turn this off for any channels you don't want to create tickets
Set Status Change Triggers
- Update status when an email is sent or received
- Choose which statuses to switch to for each trigger
- Disable triggers if you don't want status changes
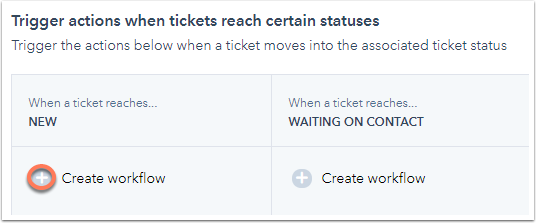
- Add Status-Based Actions
- Click "Additional status automation" to expand
- Hit the + icon to add actions for each status
- Options like sending emails or internal notifications
- Edit, comment on, or delete actions as needed
Setting up ticket automation eliminates repetitive tasks and keeps your team notified of ticket changes. Let me know if any part of setting up automation needs more explanation!
Take Customer Service to the Next Level with HubSpot Tickets
Implementing a solid ticketing process with HubSpot Service Hub can improve your team's ability to provide fast, efficient customer support.
With tickets organizing each customer inquiry and automated workflows steering tickets to resolution, agents can handle more requests and focus on solving problems. Seamless collaboration on tickets also leads to more efficient issue resolution.
HubSpot's robust ticketing features help service teams improve organization, collaboration, and productivity — enabling better customer experiences.
Remember to create comprehensive tickets for all inquiries, customize workflows and statuses, stay on top of your inbox, and leverage automation to streamline management.
Get Expert Help Setting Up Service Hub Tickets
Ready to implement HubSpot Service Hub and transform your customer service with more innovative ticketing processes? The customer service experts at Origin 63 can guide you.
We’re a certified HubSpot partner with years of experience helping companies get up and running with Service Hub.
From initial setup and customization to optimized workflows, our team provides hands-on guidance so you can quickly provide excellent customer experiences.
Contact us to learn more about leveraging HubSpot Service Hub tickets and other tools to strengthen your customer service capabilities.






.png?width=90&height=90&name=Arrows%20Partner%20Badge-test%20(1).png)

